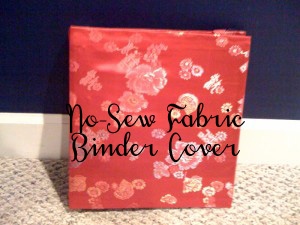
I love binders and notebooks. Recently, though, I have realized that I hate using UGLY (or boring) binders. If it’s not pretty, I won’t use it. It needs to be (for me) both aesthetically pleasing and practical. But I don’t have a ton of money to buy fancy looking (but cheap quality) binders and I can’t sew. Really.
I decided that I would cover my binders in fabric. The lazy woman’s way — with glue. I have tons of quality binders from my office supply junkie days. For the first two I did, I even managed to have some suitable fabric on hand (not a sewer, remember?).
Today, I’m going to show you how to make your own!
You will need:
- a binder
- 1/2 yard of fabric (cotton works best)
- hot glue gun or tacky glue (to “hem”)
- Krazy Glue
- yardstick
- an iron & ironing board (not required, but really is easier that way)
First, iron a seam about 1/2 inch at the top of your fabric. I used a yard-stick to keep it even. Let fabric cool and then glue the “hem”.
Open your binder on the fabric so that you can see just a smidge of fabric above the binder, like this:
Use a yardstick to figure out where the bottom edge needs to be to cover the binder and place under the binder:
Use that line to iron another seam into the fabric and then check to make sure that it covers the binder completely.
Cut off all but about 1/2″ for the “hem” and glue down like you did with the first one.
Place your binder in the middle of your fabric again and determine how far inside the binder you would like your fabric to come and then cut off the excess. I had about 2″ of fabric come to the inside of my binder.
Iron another seem of about 1/2″ for the side “hems.” Do this on both sides.
Center your binder inside and fasten fabric to binder using Krazy Glue. First I traced the outline of the spine, then the front cover, then the back cover and then the insides. I put it right on the main part of the binder, not the seams. I first used Aileen’s Tacky Glue but the fabric came right off of my Avery Plastic binders. It just didn’t bind well. I haven’t tried a hot glue gun, but I KNOW Krazy Glue works.
And now you have a beautiful household notebook, recipe book, seasonal book or whatever! The one above is my household notebook, made from 2 fat quarters I had on hand. I also have a winter one and a recipe one is in the works.
Have you make a fabric covered binder? Show us pics!
This post is linked to Make-It-From-Scratch Carnival #158 hosted by Lighter Side.
Looking for more great home management tips? Check out the current e-book bundle of the week!

6 Comments on Making Your Own Fabric-Covered Binder – No-Sew Version!
2Pingbacks & Trackbacks on Making Your Own Fabric-Covered Binder – No-Sew Version!
-
[…] Making Your Own Fabric-Covered Binder – No-Sew Version! […]
-
[…] week, I posted a tutorial about making your own fabric covered binder (without sewing). One (but by no means the only) reason that previous household notebooks didn’t work for […]


Discovering Montessori
27 January 2013 at 10:58 PM (12 years ago)I am so doing this! Thank you for sharing.
Stopping by from the TOS Crew.
[Reply]
Beth
28 February 2012 at 5:27 PM (13 years ago)This is beautiful! I think I shall try this! 😀 Good job!
Beth´s last blog post ..The Fear Of The Lord
[Reply]
Erica
5 July 2011 at 4:56 PM (13 years ago)Hi! I am wondering, once the cloth cover is made, how to clean it when it gets dingy! I would love some tips! Thanks! Erica
[Reply]
Rachel
5 July 2011 at 12:34 PM (13 years ago)You can make these really fancy too. I did one as a wedding album for my sister. If you want to cover up the inside covers, you can cut a piece of thin cardboard to fit each of the inside covers and use spray glue to apply fabric to each of the pieces of cardboard, turning the edges over like you did on the fronts. Then glue the covered pieces of cardboard into the insides of the covers of the binders. If you want to be able to put a photo on the front of the album, take a picture mat and cover it with fabric and glue it on the front of the album (if you want it padded then put some stuffing or batting under the fabric as you glue). You can also use quilt batting to pad the entire album. If you use nice fabric and trim the edges with lace it looks REALLY nice. Spray with Scotchguard and it will last a long time.
[Reply]